INTRODUCTION
If you don’t know anything about node, webpack or react don’t worry I’ am going cover all of them form A to Z. In this article we are going to cover how setup your own webpack-dev-server with express that ultimately you can switch between development and production environment without any burden. For development we are using webpack-dev server bundle with express and for production we are using only express server. If you prefer other servers for production or ultimate app we are also discuss how to setup it for you. So why are we waiting. Let’s Begin.
Step 01: Installing Node and Node package manager (npm)
Installing node on your computer
a. Windows:- https://nodejs.org/en
b. Mac:- https://nodejs.org/en
c. Linux:-
    sudo apt-get install curl
	curl --silent --location https://deb.nodesource.com/setup_5.x | sudo bash -
	sudo apt-get install nodejs
Step 02: Create your react workspace
You can use your own folder structure for your own project. Today I am going to tell you how to setup basic one.
- myProject
- js //Directory that holds all your project codes. Inside this folder use your own folder structure to organize your code
- entry.js //It can be any name. This is the entry point to all your codes.
- config //Directory holds all your project configurations
- config.js
- public //Directory holds all your public or static assets like images
- index.html
- server.js //Express and webpack-dev configurations goes here
- webpack.config.js //default file searched by webpack for it’s configurations
- webpack.dev.js //Compiler for development environment
- webpack.prod.js //Compiler for production environment
- .babelrc //used to define babel presets
- js //Directory that holds all your project codes. Inside this folder use your own folder structure to organize your code
Sometimes you may not aware why those files and folders were there. Don’t worry everything will be clarified during this tutorial.
Step 03: Installing required modules.
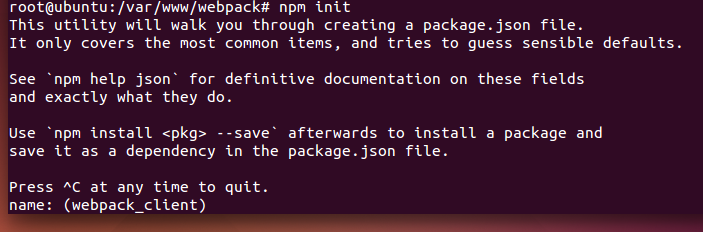
First of all we need to activate npm environment in your project.Open your terminal or command prompt, then navigate to your project root folder and run below command
npm initIt will show below screen. First parameter to pass is project name. You can see at the bottom of this picture.
Now you just setup your npm environment. let’s install required modules.
    npm i  webpack –g
    npm install --save-dev babel-cli -g
    npm install --save react react-dom
    npm install --save-dev babel-preset-es2015 babel-preset-react babel-preset-stage-0 babel-polyfill babel-preset-stage-0
Brief explanation about babel-preset-xxxx modules used
babel-preset-es2015:
It allows to use ES2015 syntax without browser support. Learn more about ES2015 syntax: http://babeljs.io/docs/plugins/preset-es2015
babel-preset-react:
convert JSX syntax and strip out type annotations. learn more: https://babeljs.io/docs/plugins/preset-react
babel-polyfill:
This is use to support new globals such as Promise or new native methods like String.padStart (left-pad).
Step 04: Setting babel preset configuration file
You just install required presets. Let’s add those presets to our project. Open .babelrc file and add following code to it.
        {
          "passPerPreset": true,
          "presets": [
            "react",
            "es2015",
            "stage-0"
          ]
        }
Step 05: Setting project configuration file
Let’s add project environment configuration option and the port which your project run to our ./config/config.js file.
//For production change this to “production”
        exports.NODE_ENV = “development”
        exports.APP_PORT = 3000;
There are several ways of setting project environment like setting node environment using webpack. But I prefer this. Because main configurations required by the project handle by one file.
Step:06 Create webpack configuration chooser according to project environment. (development or production)
open ./webpack.config.js add following code to it.
 const config = require("./config/config.js")

if(config.NODE_ENV == "development"){
  module.exports = require("./webpack.dev.js")
}else{
	module.exports = require("./webpack.prod.js")
}
Why name (webpack.config.js) maters ?
Webpack by default search for webpack.config.js file. According to environment we tel which file to use for webpack configurations.
Step 07: Setup webpack development environment.
add Following code to webpack.dev.js
var path = require('path');
var webpack = require('webpack');
var path = require("path");

module.exports = {
    devtool: 'cheap-module-eval-source-map', //for development
// location of your main js file
    entry: [
      path.resolve(__dirname, 'js', 'entry.js'),
      ],

    output: {
        path: path.join(__dirname, "public/static"), //Where to place Final Compiled js
        filename: "bundle.js",    //Name of compiled js
    },

    module: {
      loaders: [
        {
          exclude: /node_modules/,
          loaders: ['babel'],
          test: /\.js$/,

        }
      ]
    },
    plugins: [
      new webpack.HotModuleReplacementPlugin(),
      new webpack.NoErrorsPlugin(),
    ]

}
By using above file we just setup development environment configurations. Things we done here are.
- setup entry js for our project
- Setup where to output final js
- Setup Hot reloading
Step 08: Setup Webpack production environment.
Add following codes to webpack.prod.js
var path = require('path');
var webpack = require('webpack');
var path = require("path");

module.exports = {
    devtool: 'cheap-source-map',
    entry: [
      path.resolve(__dirname, 'js', 'entry.js'),
      ],

    output: {
        path: path.join(__dirname, "public/static"), //Place where Final Compiled js is created in production evirnment
        filename: "bundle.js",
    },

    module: {
      loaders: [
        {
          exclude: /node_modules/,
          loaders: ['babel'],
          test: /\.js$/,

        }
      ]
    },
    plugins: [
        new webpack.DefinePlugin({
            "process.env": {
              NODE_ENV: JSON.stringify("production")
            }
          }),
        new webpack.optimize.UglifyJsPlugin({
          compress: { warnings: false },
          minimize: true
        }),
        new webpack.optimize.MinChunkSizePlugin({minChunkSize: 10000}),
        new webpack.optimize.LimitChunkCountPlugin({maxChunks: 15}),
        new webpack.optimize.DedupePlugin()
    ]

}
By default React is in development mode. Which is slower. To use react in production mode we set the webpack environment variable NODE_ENV to production
This file is same as webpack development file (webpack.dev.js). But contains some optimization plugins. For More details about webpack optimize plugins visit https://github.com/webpack/docs/wiki/optimization.
Step 09: let’s create our Express server with webpack compiler.
var express  = require('express');
var path  = require('path');
var webpack = require('webpack');
var WebpackDevServer = require('webpack-dev-server');

//Used to buddle Webpack-dev server with Express
var webpackDevMiddleware = require('webpack-dev-middleware')

//This will automatically detect changes we made to source code and recompile automatically on change
var webpackHotMiddleware = require('webpack-hot-middleware')

//application configurations
var appConfig = require("./config/config.js")
//import webpack configurations we just created
var webpackConfigs = require('./webpack.config.js')
//Setting Project Port(Eg: http://localhost:3000)
var APP_PORT = appConfig.APP_PORT;
//Initialize express server.
var Server = new express();


//Setting Development Envirnment With Express
if(appConfig.NODE_ENV == "development"){

  var compiler = webpack(webpackConfigs);

  //configuring webpack server structure. that ultimately used as express server middleware

  var webpackDevServerMiddileware = webpackDevMiddleware(compiler, {
    publicPath:"/static/", //Place where development compiled js created. /static/bundle.js
    stats: {colors: true},
    noInfo: true,
    inline: true,
  });

  //Add Webpack dev-server to express
  Server.use(webpackDevServerMiddileware)

  /**Real time compiler as you code.
  */
  Server.use(webpackHotMiddleware(compiler))

}
//End of development Envirnment


//setting server routing

Server.get("/", function(req, res) {
  res.sendFile(__dirname + '/public/index.html')
})

//Add Server Public Folder. Same location used for webpack-dev Server
Server.use(express.static('public'));

Server.listen(APP_PORT, function(error) {
  if (error) {
    console.error(error)
  } else {
    console.info("==> 🌎  Listening on port %s. Open up http://localhost:%s/ in your browser.", APP_PORT, APP_PORT)
  }
})
Explanation: Every thing you should know are commented near each code line. what is webpackHotMiddleware ? This make your life easier. I mean your coding life. Every time you change your code it will automatically detect code changes and compiled it for you.
Step: 10 Let’s create our HTML file.
Add following codes to ./public/index.html
<!DOCTYPE html>
<html lang="en">
    <head>
        <title> Test React App </title>
    </head>

    <body>

        <div id="root" > </div>
        <script src="static/bundle.js" type="text/javascript"></script>

    </body>
</html>
Step:11 Run your application in development mode.
Check weather NODE_ENV variable created by us is set to “development” in ./config/config.js. Then open your terminal and navigate to project root folder and run below command. that’s all
sudo npm start Step:12 Run your application in production mode.
Open ./config/config.js and change it’s NODE_ENV value to “production” as follows
//For production change this to “production”
        exports.NODE_ENV = “production”
        exports.APP_PORT = 3000;
Then open your terminal and navigate to project root folder and run following command
npm run build This will create final compiled js at ./public/static folder. and run the express server without webpack-dev server.
Step: 13 Use it with other servers like apache.
For this you should have webpack install in global mode. if not run below command.
npm i webpack -gThen to build final js file run below command
webpack --progress -pBy Running the command in setp 12 also do the same thing. webpack will create final js at ./public/static folder. just copy index.html and ./public/static folder and include them in a server that you wish to run.
View on GitHub.

Direct download source code.